
Entity setup
Under Setup confirm the following sub-menu items:
Organizational Structure | Charts of Accounts | Entity Accounts |
|---|---|---|
This feature allows the entity to setup different departments with the entity | This feature allows the entity to setup the different accounts used. For example Revenue from non-exchange. | This feature allows the entity to link the Trail Balance accounts to the financial statements allocations. For example linking the Revenue account to the Revenue line item as per the Chart of Accounts. |
Chart of Accounts:
The Charts of Accounts needs to be loaded on Dynamic AFS before it can be linked to Accounts and Accounts Numbers.
The process to load Accounts on to Dynamic AFS is as follows:
Identify Account Numbers and their Descriptions that have to be added to the system.
Insert these new accounts and their descriptions into an Excel document, containing the following columns and headers: Account; Description; AFS Type; Category; Sub Category; Item; Item type; Movement.

On www.dynamicafs.com, click on “Setups”, then on “Chart of Accounts”, and then on the sub-item for “Import”.
Adding and linking new Accounts:
The Dynamic AFS system needs to be informed what the relevant Account Numbers are for which amounts must be imported from the Trial Balance.
In certain instances the Trial Balance may for example contain accounts which are totals of other accounts, and should be ignored.
Hence, the user needs to specifically upload the relevant transactional accounts that it expects to be utilized by Dynamic AFS.
An Account Number can therefore only be linked or classified within Dynamic AFS if the account number has been added to the system.
This process is as follows:
Identify Account Numbers and their Descriptions that has to be added to the Financial Statements.

Update the Chart of Accounts on the Dynamic AFS. Left click on “Setup”, then left click on “Chart of Accounts” and then left click on “View”. The below image should appear.

Click on the Item type where the additional Financial statement line item will be added. In this illustration, the user should left click on “Financial Performance” and the below image should appear.
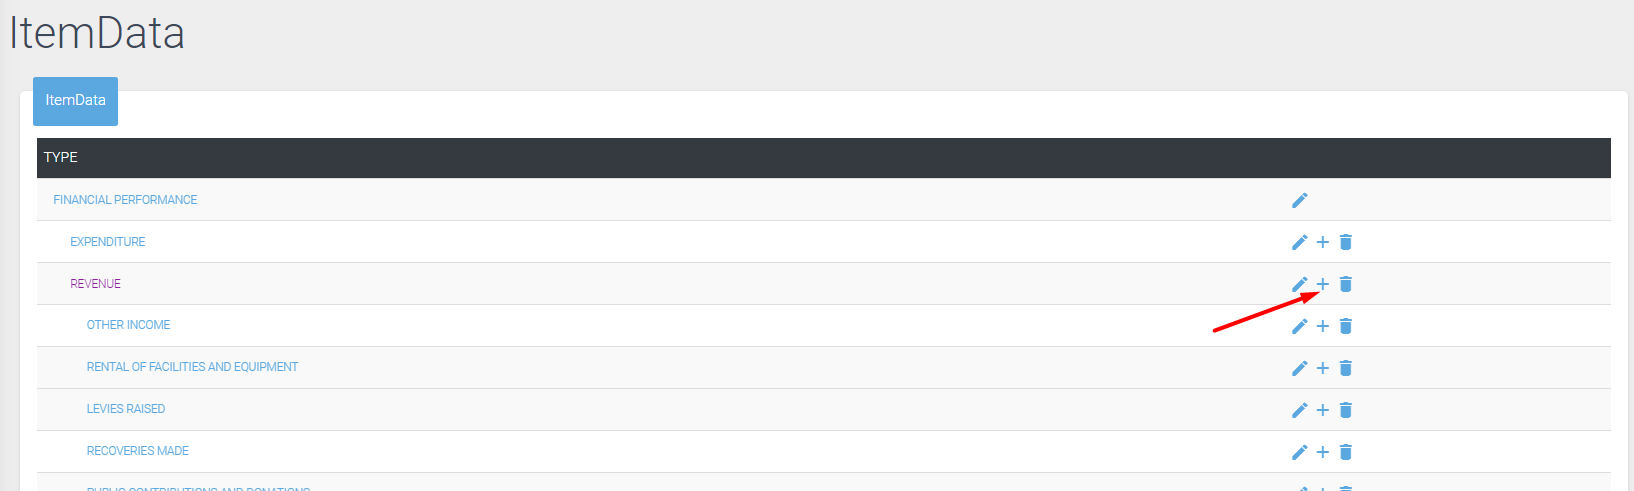
The user will left click on the plus sign to add a new account under Revenue. The user will then add a description in the pop up box as illustrated below.
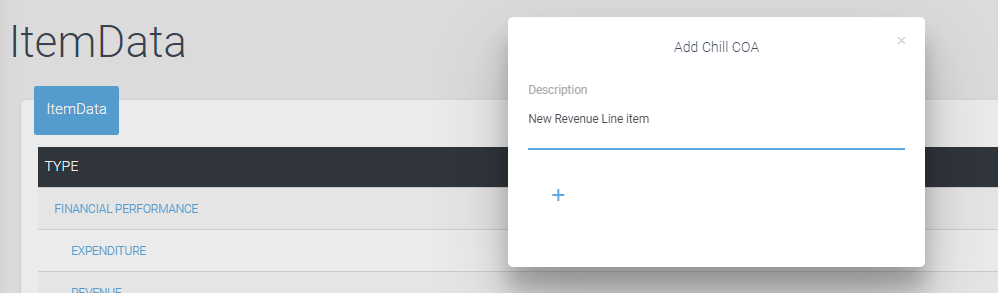
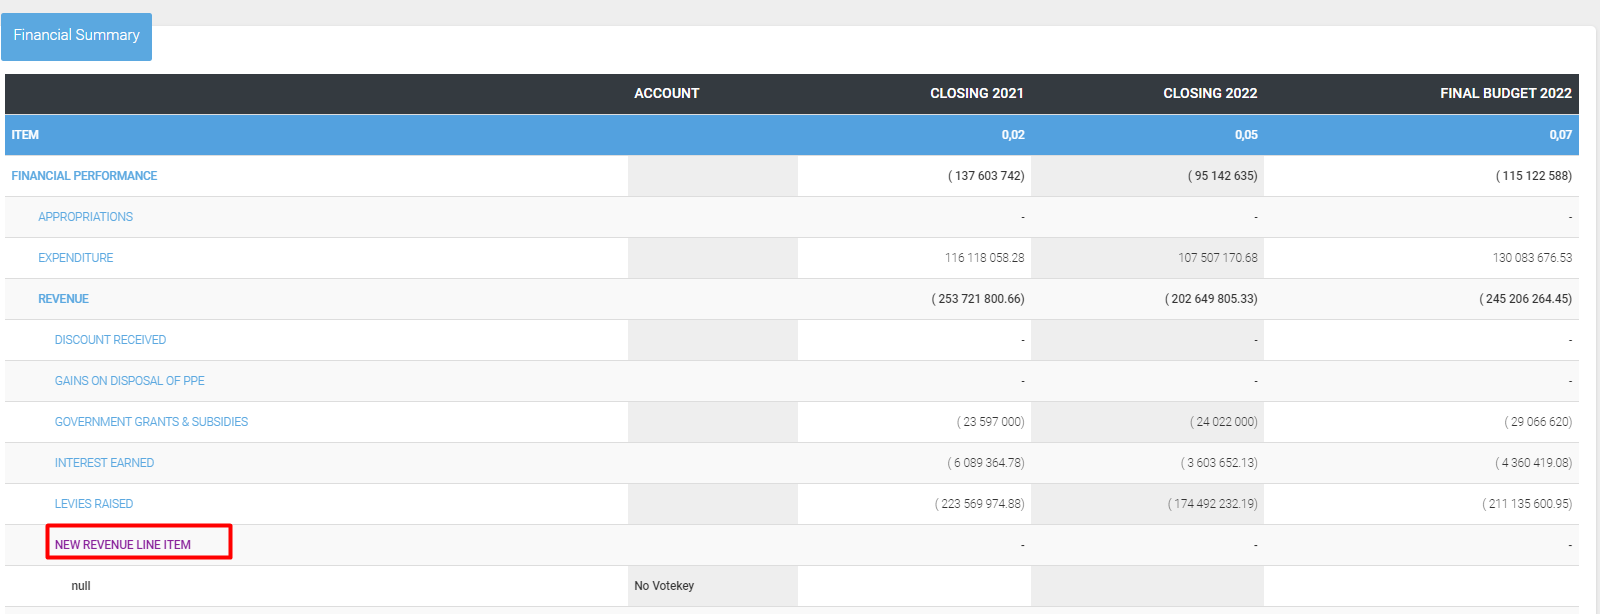
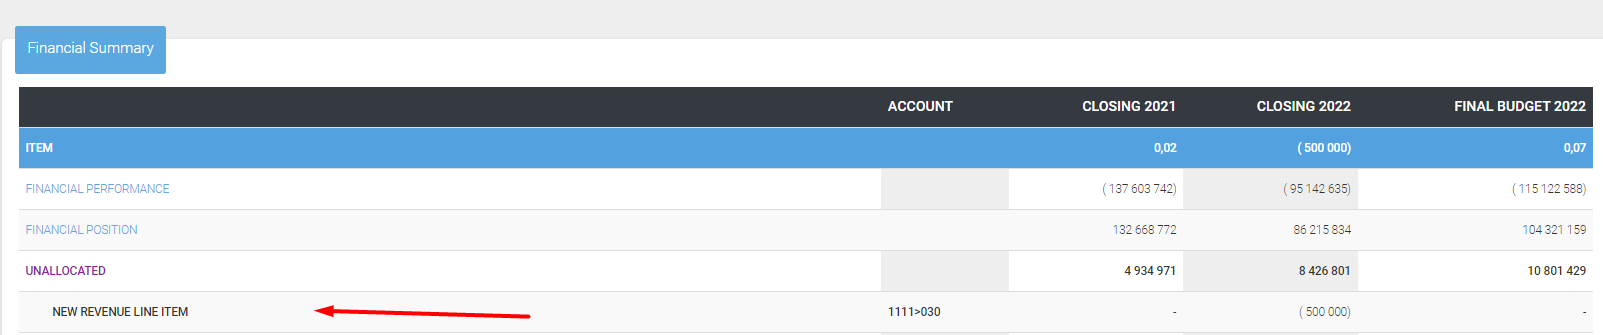
After the user has left clicked on the plus sign the new account will be added to Dynamic AFS. To ensure that the new line item has been added, the user can check under the financial summary if the account is reflected as indicated below.
Once the new line item has been added to the Chart of Accounts, the line item will also have to be imported into the Entity Accounts on Dynamic AFS. The user will left click on “Setup”, then left click on “Entity Accounts”, and then left click on “Import”. The below image will appear.
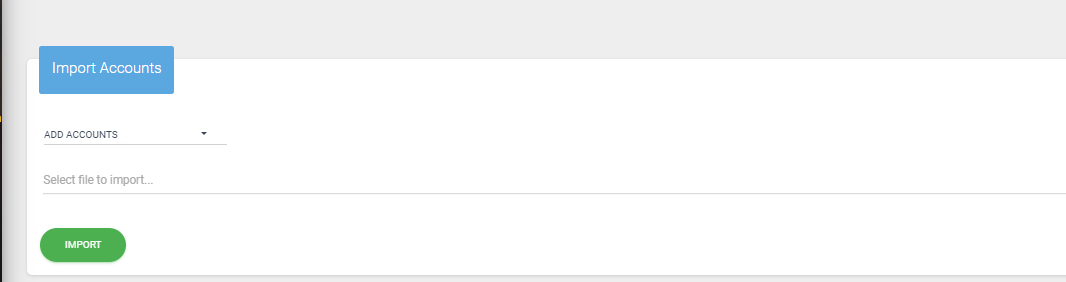
The identified account should be imported here. To import the accounts, the Account number and description will be required. Once the below excel has been uploaded, the Trail balance can now be uploaded to Dynamic AFS.

After the Trail balance is uploaded the new line item will be imported as an unallocated account as it is not link to a specific line item, such as Revenue, Expenditure, Assets or Liability.
Once the new line item has been successfully added to Dynamic AFS, the user will have to link the account number to a line item. In this illustration, the account number is 11111>030, which is to be linked to “New Revenue line item” which the user added under chart of accounts. The User will left click on “Setup”, then left click on “ Entity Account” and then left click on “Link”. The below image will appear.
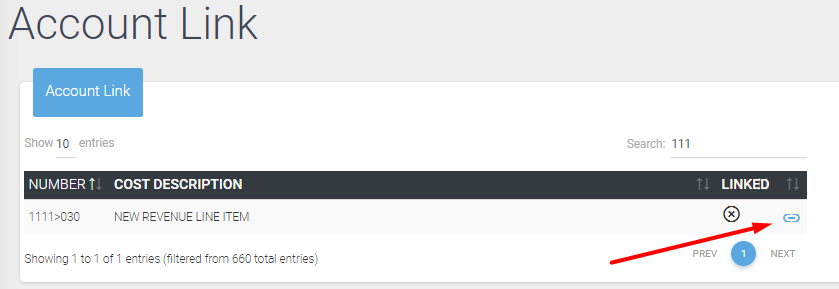
The user will left click on the linkage button, and the click on the chart of accounts untill the required account is identified. Once the account is identified the user should left click on the linkage button. The Account number 11111>030 will then be successfully linked to the new line item.
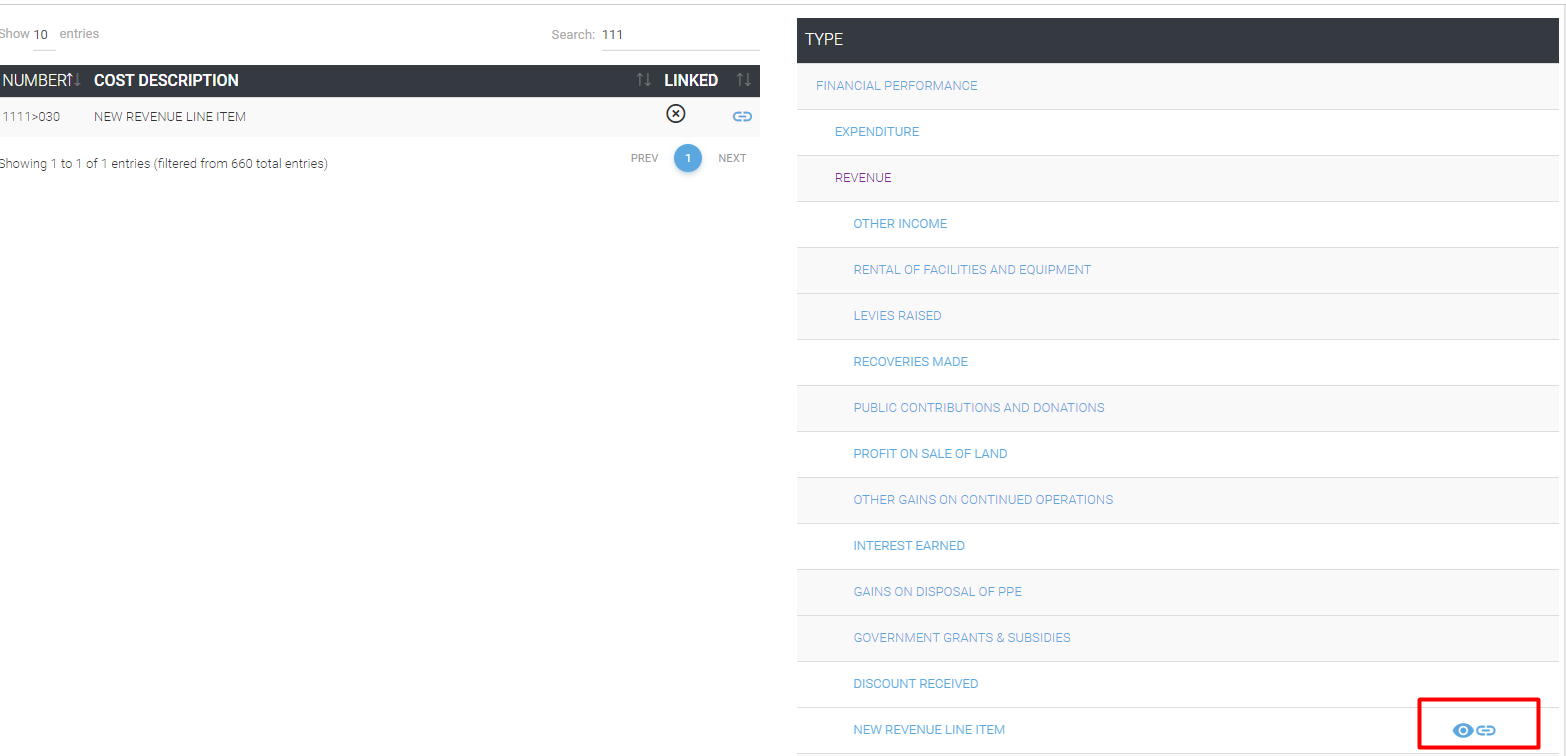
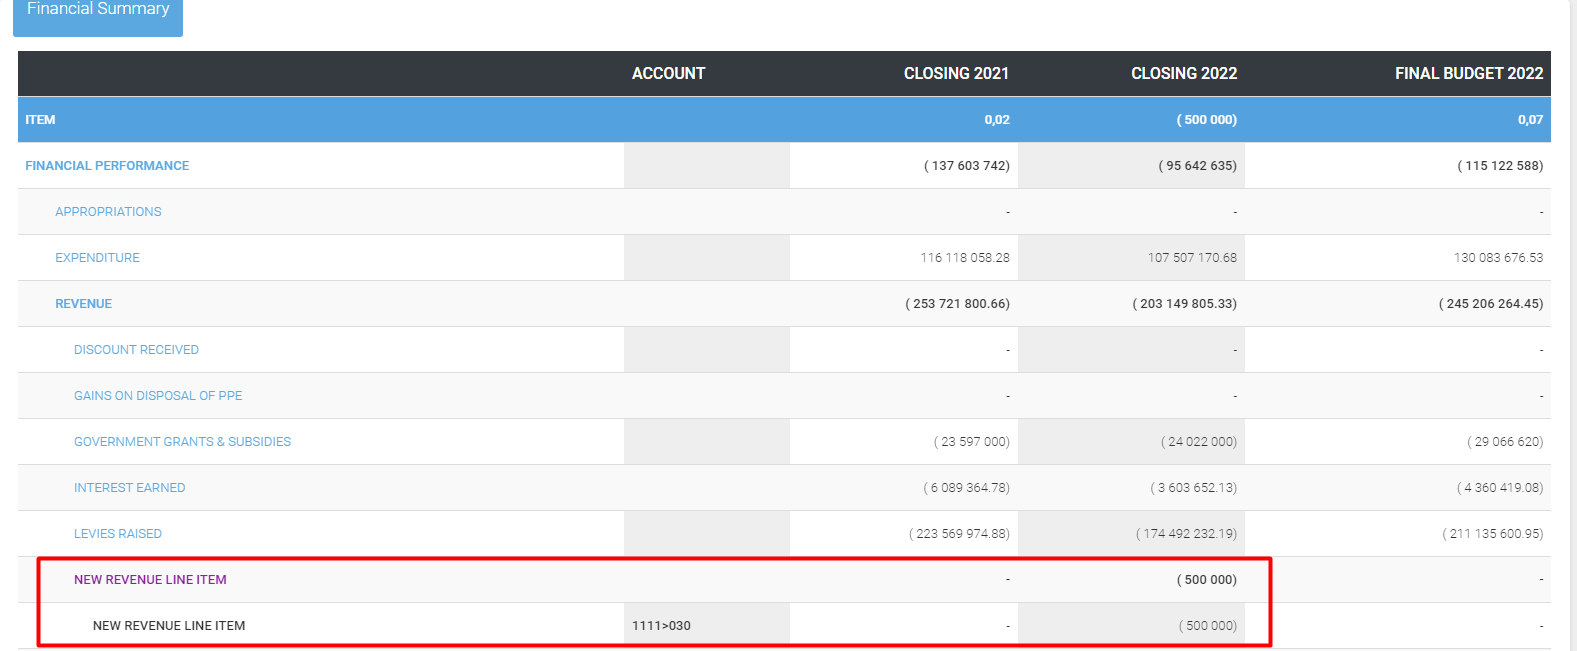
After linking the account number to the line item, the account number 11111>030 should now be allocated to revenue and is ready to be mapped in the financial statements
To map the new line item, so that the system automatically pulls through the figure the user will make use of the Ducharme menu.
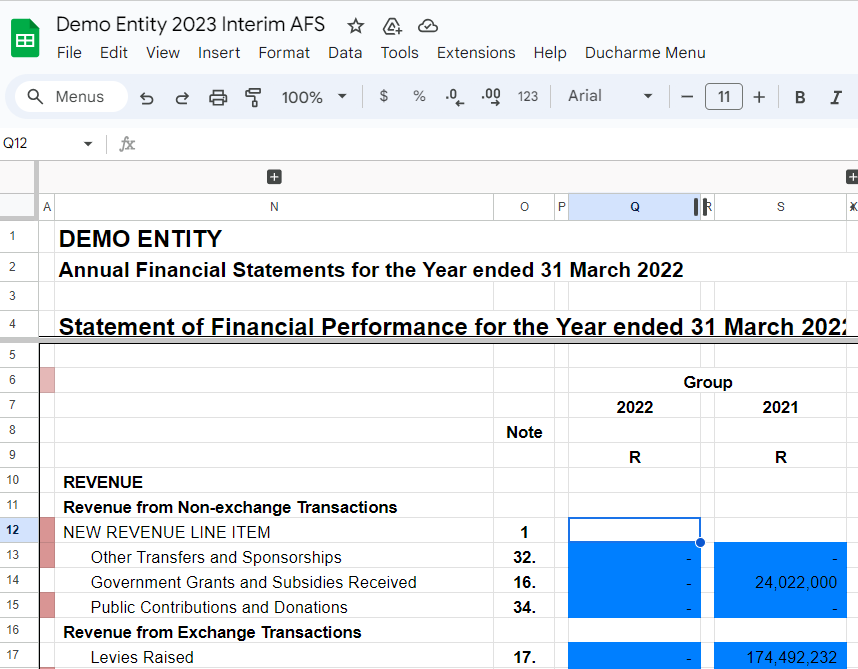
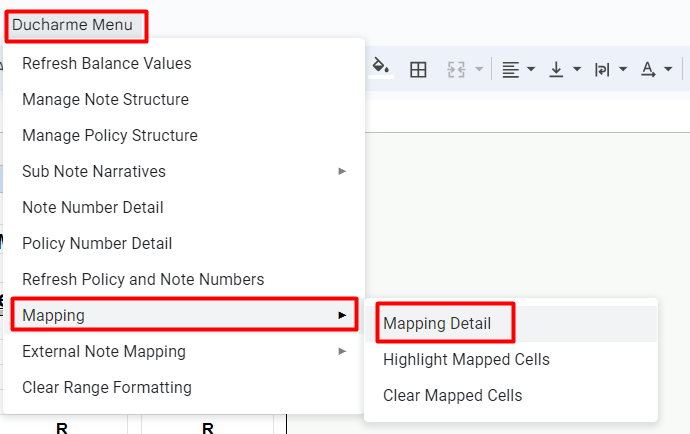
13. In the Annual Financial Statements, the user will in left click on “Ducharme Menu”, then ”Mapping” and “Mapping Detail”.
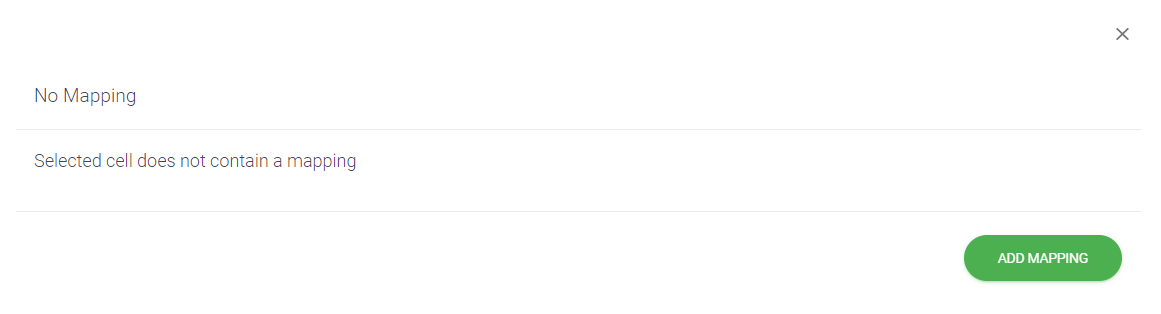
The below image will appear. The user should then left click on “add mapping”.
After clicking on “add mapping”, the below image will appear. The user is required to select the financial year and include the item details as indicated in the image. The user should then left click on save for the mapping to be added.
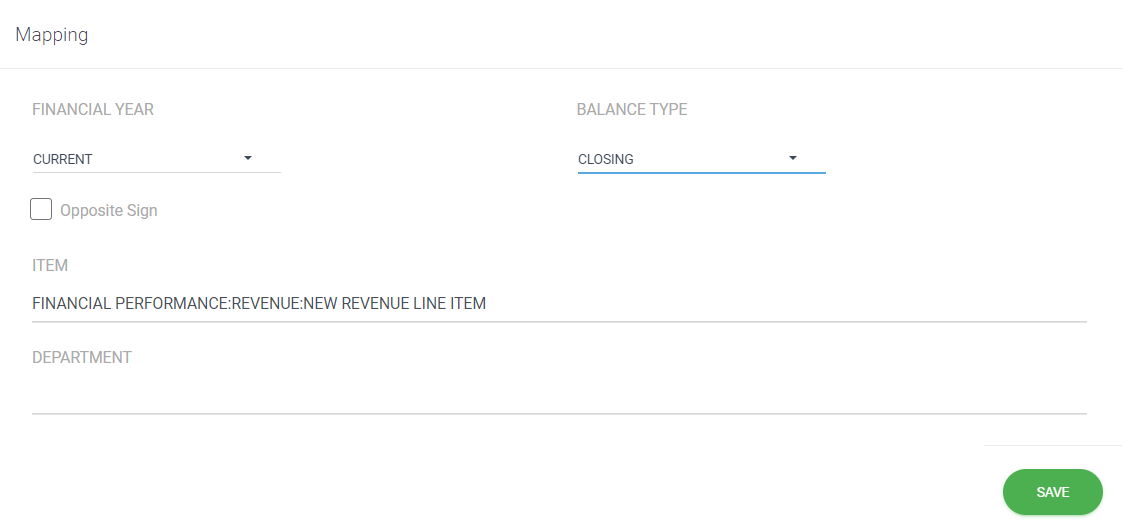
Once the mapping has been added, the user can refresh the balances for the values to pull in the new account.